
16E09-101
USER MENU
USER MENU OPERATION SETTINGS:
The control has user Menu settings that will determine how
the control operates. The unit is shipped with factory de-
fault settings. The user must change any of the settings as
required for the application. To reset all settings to factory
defaults, press and hold all 3 buttons simultaneously (
,
, and buttons) for approximately 5 seconds.
To view Menu items, press and hold
for 5 seconds.
The unit will display the first Menu item on the left side of the
display. The right side of the display indicates the Menu item
settings. To change the setting, momentarily press the or
key.
A momentary press of the
key advances the display to
the next Menu item, and continues, till the last menu item is
displayed. Pressing the key one more time with the last menu
item, (aL) displayed returns the control to the operating mode.
Each press of
results in forward movement to the next
Menu item. If you need to change an item “passed”, you
must repeatedly press
, return to the operating mode,
then press and hold
for 5 seconds to re-enter the Menu
mode. Then repeatedly, momentarily press
until the
desired Menu item is again displayed.
To store any changes made to any Menu items, the Menu
must be exited by pressing
when the last item is
displayed. If no buttons are pressed for ten minutes while in
the menu, the control will return to operating mode and any
changes that were made will be lost.
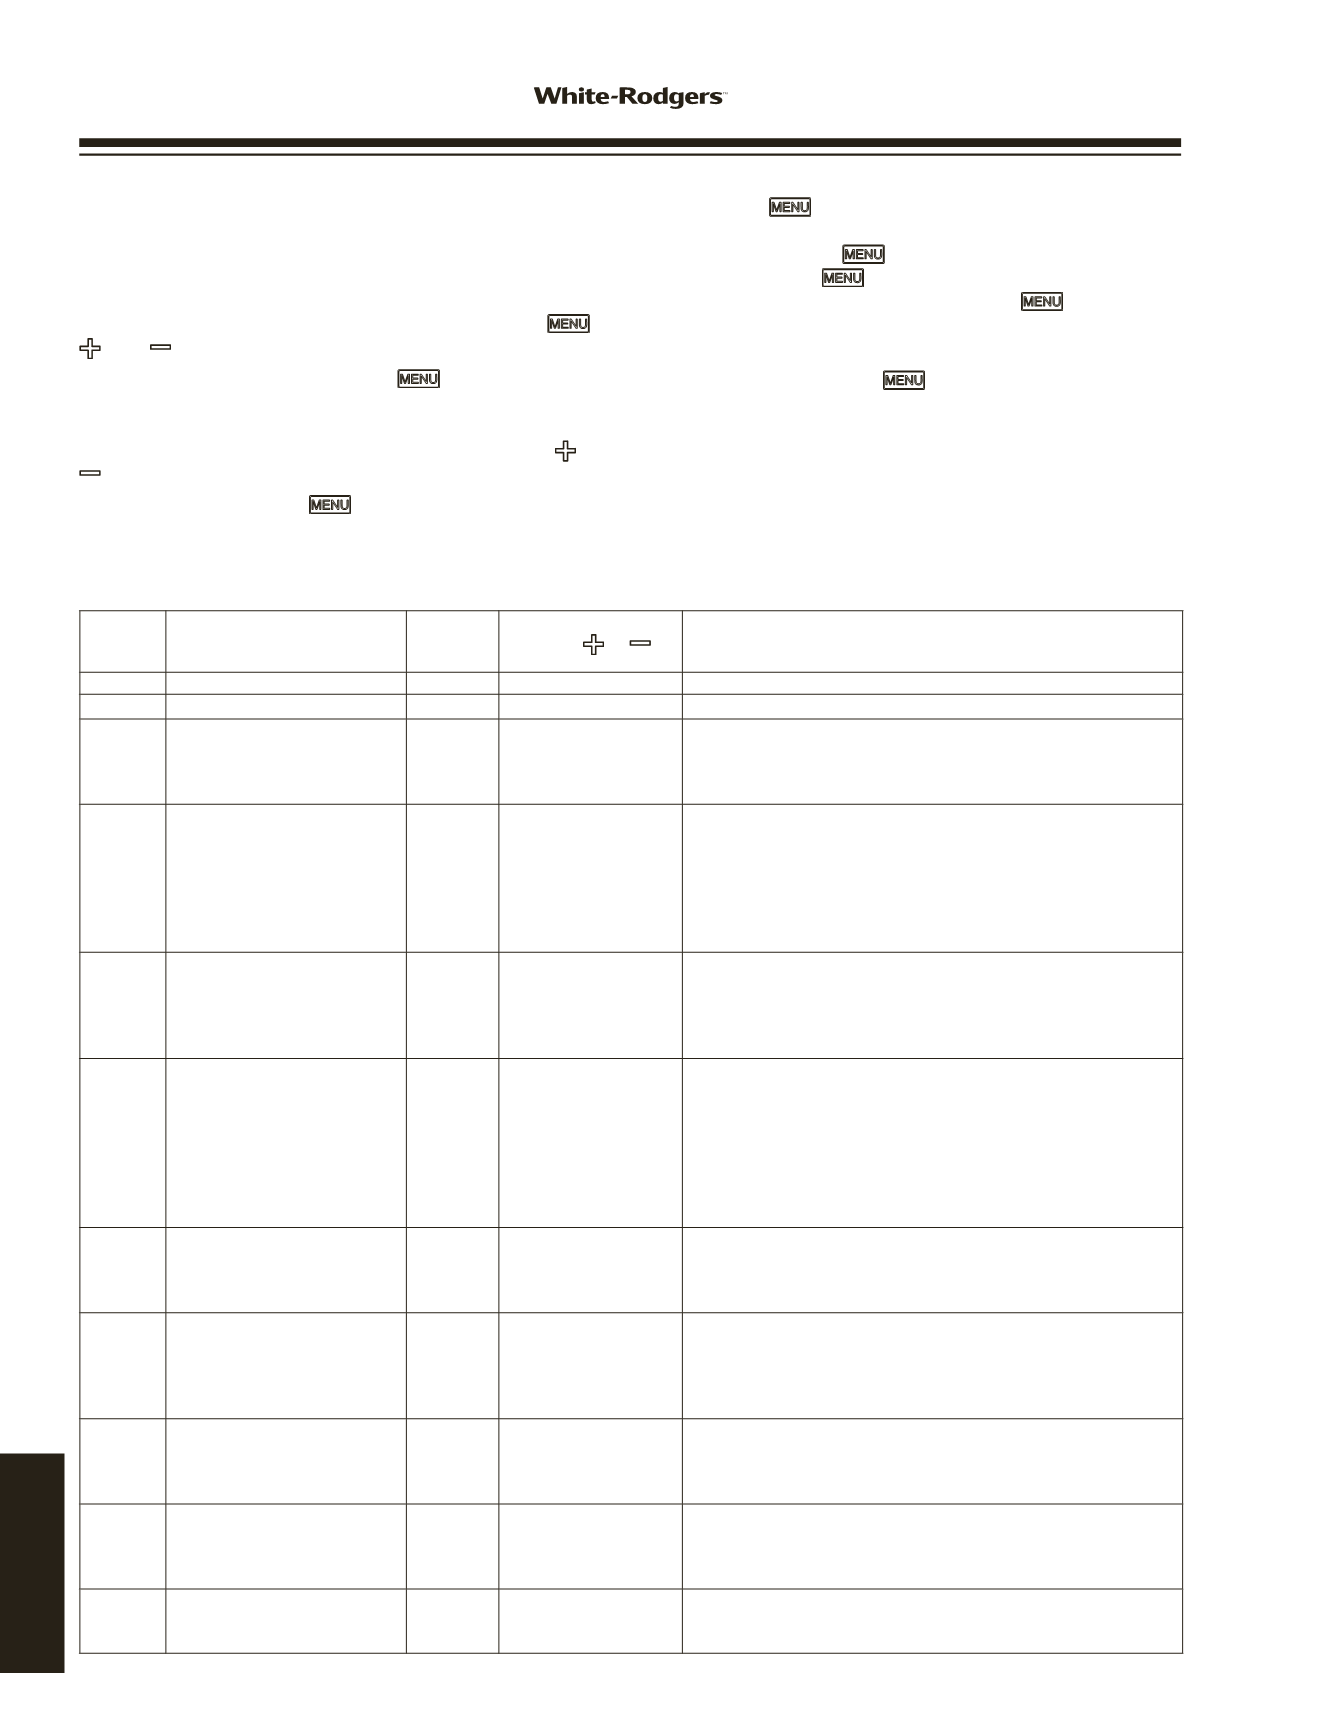
The following table shows the menu items, default settings
and optional settings.
NOTE:
The Heat/ Cool switch (SW1) MUST be in the proper
position BEFORE setting options.
Menu
Item
Description
Factory
Default
Options
Press
or
to select
Comments
CF Temperature Scale
F
C or F
Selects temperature display in Fahrenheit or Celsius
dFF Differential
5
1 to 30
Selects the range between Cut In and Cut Out.
SP Set Point Mode
Cool
Heat
Cl
CO
CO or CI
CI or CO
Selects how the set point temperature will operate the load
terminal. CI indicates the setpoint temperature will be the Cut
In temperature. CO indicates the temperature will be the Cut
Out temperature. See Operation section.
SOF Sensor Operation Failure
Cool
Heat
1
0
0 or 1
None
Cooling - Selects the operation of the Control Load relay in the
event of a sensor failure in Cool mode. 1 (default) will cause
the load contacts of the relay to close and remain closed if the
sensor either opens or shorts. 0 causes the load contacts of
the relay to open and remain open.
Heating has no optional selection. Sensor failure
in Heating will result in the relay contacts opening.
dL Display Light
Off
On or Off
Selects the LCD display light Off or On. With this selected Off,
the display light will illuminate any time a keypad button is
pressed to provide better viewing in low lighting conditions, and
go off after 10 seconds. If On is selected, the display light will
be On continuously.
ASd Anti Short-Cycle Delay
Cool
1
Heat
0
0 to 12
Selects the minimum time (in minutes) that the load contacts
will remain open after a cycle before closing again. This will
prevent the compressor or other load from being damaged by
cycling too soon. A blinking Snowflake or Flame icon indicates
that the control has a demand to energize the load, but is
waiting for the delay time to elapse. A setting of 0 indicates no
time and the feature is disabled. SW1 must be set to the proper
position before checking this setting.
LP Lock Front Panel Keypad
Off
On or Off
When selected Off, the keypad can be used as normal. When
selected On, prevents unauthorized access to the control set-
tings by locking out all keys. To unlock the control when it is
locked, press and hold the Menu key for 5 seconds.
OFS Ambient Temperature
Offset
0
-4, -3, -2, -1, 0,
1, 2, 3, 4
This control is calibrated at the factory, but the “sensed" tem-
perature may read different because of mounting/installation,
or other factors. This item allows the displayed temperature to
be shifted the number of degrees set to compensate for this
difference
bIn Binary Input
Off
On or Off
The default setting of Off will have no affect on the operation
of the thermostat. When set to On, it allows an external binary
input (switch or relay) to start a temperature set back. See Set
Back (Sb).
Sb Set Back
0
0 to 50
Selects the number of degrees the thermostat will change the
setpoint temperature when the external binary input signal is
received. 0 will cause no temperature change to occur. See
Binary Input (bin).
AL Alarm
0
0 to 99
Selects the time delay (in minutes) before a Temperature Out
of Range alarm output is sent.
A setting of 0 disables the alarm relay.
www.white-rodgers.com200
TECHNICAL HELP


